A winter power outage does not have to leave you without heat just because you do not own a generator. With a properly sized inverter, a compatible vehicle can supply emergency electricity to a gas furnace or refrigerator.
That is a pretty cool use for something you already own. Instead of spending $500 or $1,000 on a separate generator or power station, the basic inverter and battery-cable setup I used came in under $200 at the prices available for this demonstration.
There are limits, though. This is a way to power selected essentials, not your entire house. And getting electricity from a vehicle to a hardwired furnace requires more than simply finding an extension cord.
Table of Contents
- Key Takeaways
- How a Vehicle Can Supply Emergency Power
- The Equipment and What It Cost
- Size the Inverter for the Load, Not the Number of Outlets
- Prepare the Inverter and Battery Connections
- Get Power to the Furnace Without Backfeeding
- Switch to Backup Power and Test the Heat
- Plan for Battery Charging, Exhaust, and Runtime
- A Useful Backup Option, With Real Limits
Key Takeaways
- A compatible vehicle and inverter can supply emergency electricity to selected essentials, including some gas furnaces.
- The under-$200 equipment cost excludes the furnace transfer connection, extension cord, and installation.
- Inverter capacity, appliance starting demand, and vehicle charging capacity must all match the intended load.
- Safe operation requires proper utility isolation, protected electrical connections, and outdoor vehicle exhaust management.
How a Vehicle Can Supply Emergency Power
In a conventional gasoline-powered vehicle, the engine spins an alternator. The alternator supplies electricity to the vehicle and replenishes its battery. An inverter takes the battery’s DC electricity and converts it into household AC power.
The basic path looks like this:
- The engine drives the alternator.
- The alternator supplies the vehicle’s electrical system and charges the battery.
- The inverter converts battery power into household AC power.
- An extension cord carries that power to a suitable appliance or an approved furnace transfer connection.
Some vehicles already have a household-style outlet. If yours does, you may already have part of the equipment you need. Check the outlet’s power rating first. Having the right-shaped receptacle does not automatically mean it can start a furnace blower or refrigerator.
This setup also is not automatically suitable for every vehicle. Confirm the vehicle manufacturer’s requirements before connecting an inverter, especially with hybrids, electric vehicles, or vehicles with battery-monitoring systems.
The Equipment and What It Cost
For this setup, I used a Renogy 1,000-watt inverter and a separately purchased set of battery-clamp cables.
- 1,000-watt inverter: Listed at $169.99, with a $20 coupon bringing it to about $150 at the time.
- Battery-clamp cables: About $12 to $13 for the set shown.
- Extension cord: Needed to carry power from the vehicle to the load.
- Furnace transfer connection: The EZ Generator Switch shown was about $88, separate from the inverter-and-clamp cost.
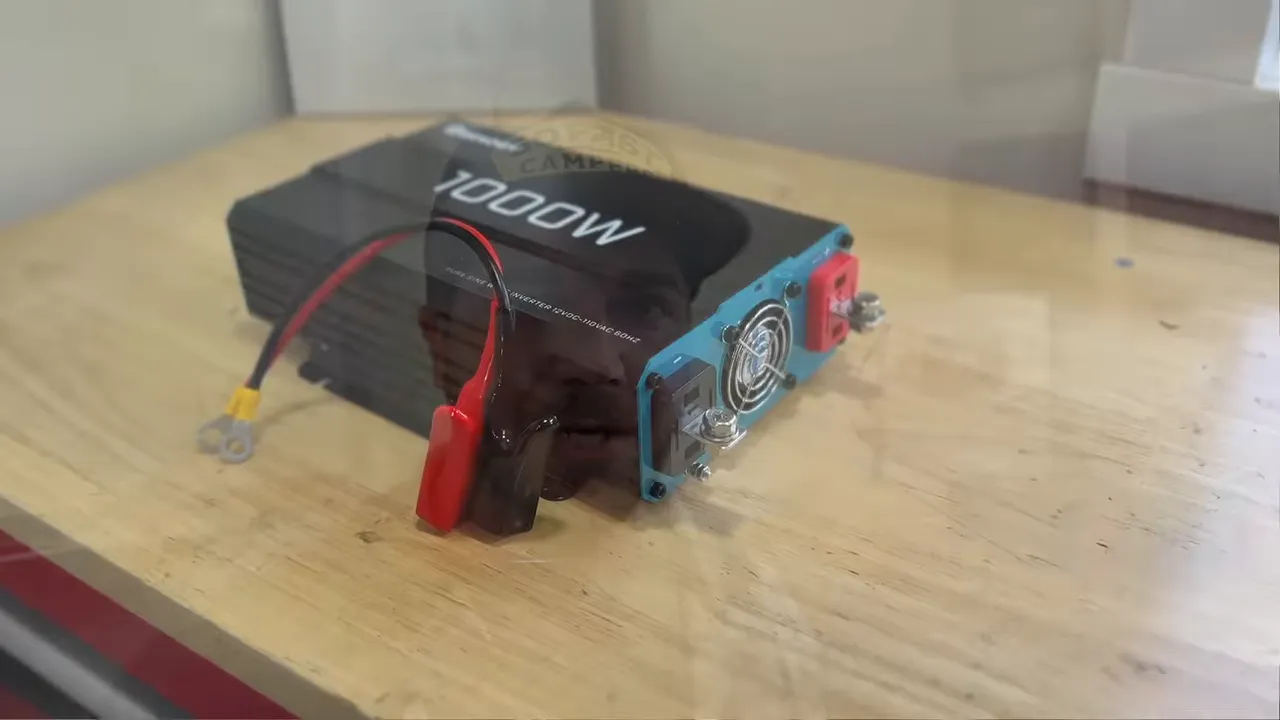
That price distinction matters. The under-$200 figure covers the inverter and clamps, not a complete installed furnace backup system. Add the transfer equipment, an appropriately rated cord, and any installation labor your situation requires. Prices and coupons can change, too.
The battery-clamp cables shown attach to the inverter’s DC terminals. Do not select cables on price alone. Cable size, length, connection rating, and required fuse protection must match the inverter manufacturer’s instructions.
The 1,000-watt unit is the size I used for this furnace demonstration. Choose your equipment around the appliance and vehicle, rather than assuming this size will fit every application.
Size the Inverter for the Load, Not the Number of Outlets
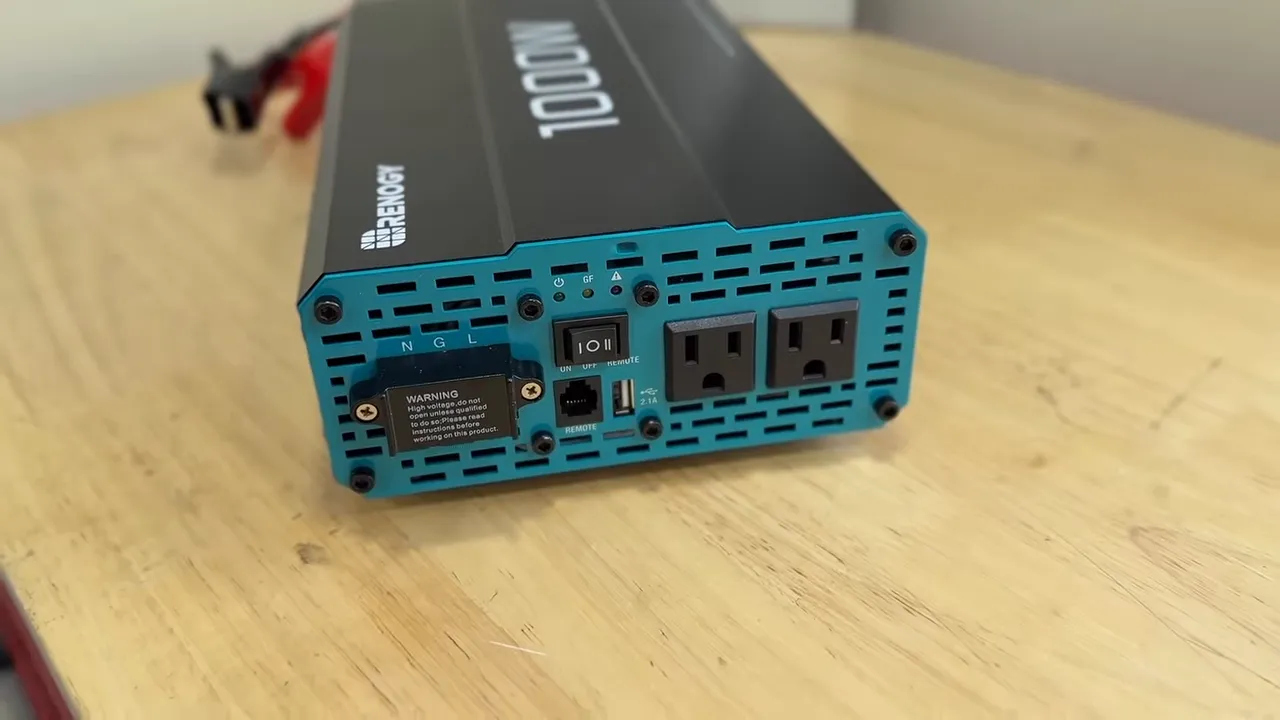
The inverter shown has two AC receptacles and a USB port. That gives you convenient connection options, but it does not give each receptacle its own 1,000-watt allowance.
All connected loads share the inverter’s total capacity. A furnace and refrigerator might each be reasonable backup priorities, but that does not mean both can run together on this particular inverter.
Before choosing an inverter, verify:
- Running demand: How much electricity the appliance needs during normal operation.
- Starting demand: Whether the inverter can handle the temporary surge when a motor starts.
- Combined demand: What happens if multiple connected appliances start or run together.
- Vehicle capacity: Whether the vehicle’s charging system can support the added load under the intended operating conditions.
Renogy also offers larger inverter sizes, including 1,500-, 2,000-, and 3,000-watt models. But buying a larger inverter does not increase the output of your alternator. The vehicle, battery, wiring, and inverter all have to work together.
For a gas furnace, the inverter supplies the electrical components needed to operate the furnace. The gas still provides the heat. This is not a setup for powering electric resistance heat or an entire electric heating system.
Prepare the Inverter and Battery Connections
On the workbench, I removed the inverter’s terminal covers and attached the clamp-cable ring terminals to the matching DC terminals: black to negative and red to positive. The connections were secured before taking the unit to the vehicle.
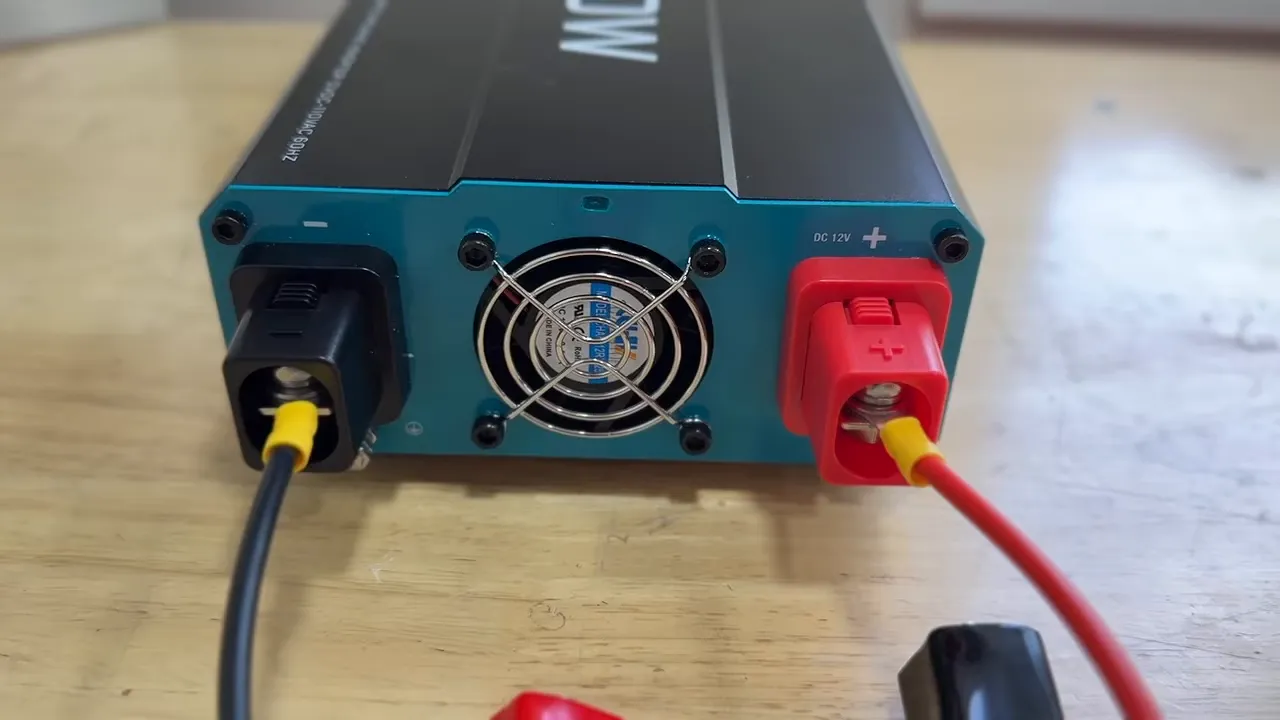
Polarity is not something to guess at. Follow the inverter’s instructions for assembly, terminal tightening, cable sizing, fuse protection, and connection order. Keep the inverter off and AC loads disconnected while making the connections.
At the vehicle, identify the manufacturer-approved positive and negative or grounding connection points. Do not assume that any convenient piece of metal is an acceptable ground, or that instructions for one vehicle apply to another.
A vehicle battery can deliver dangerous current. Keep tools and loose cable ends from bridging terminals or touching unintended metal surfaces. If you are unsure about the DC connections or protection requirements, get qualified help before proceeding.
Placement Matters More Than Hiding the Equipment
In my demonstration, I tucked the inverter into the engine compartment and closed the hood to make the equipment less exposed to theft. That convenience should not be treated as a general installation recommendation.
Use only a location permitted by the inverter and vehicle manufacturers. The inverter needs adequate cooling and protection from water, engine heat, moving belts, fans, and battery gases. Cables must stay clear of moving or hot components.
Do not close a hood over the equipment unless the arrangement is specifically suitable for it. A closed hood can restrict cooling, pinch an extension cord, or allow a terminal or clamp to contact metal. Security does not outweigh electrical and fire safety.
Get Power to the Furnace Without Backfeeding
A refrigerator normally has a cord you can connect directly to an appropriately rated extension cord. A hardwired furnace needs a proper way to change power sources.
For this furnace, I used an EZ Generator Switch, identified as UL listed for the unit shown. It provides a generator inlet and a selector for normal utility power or backup power.
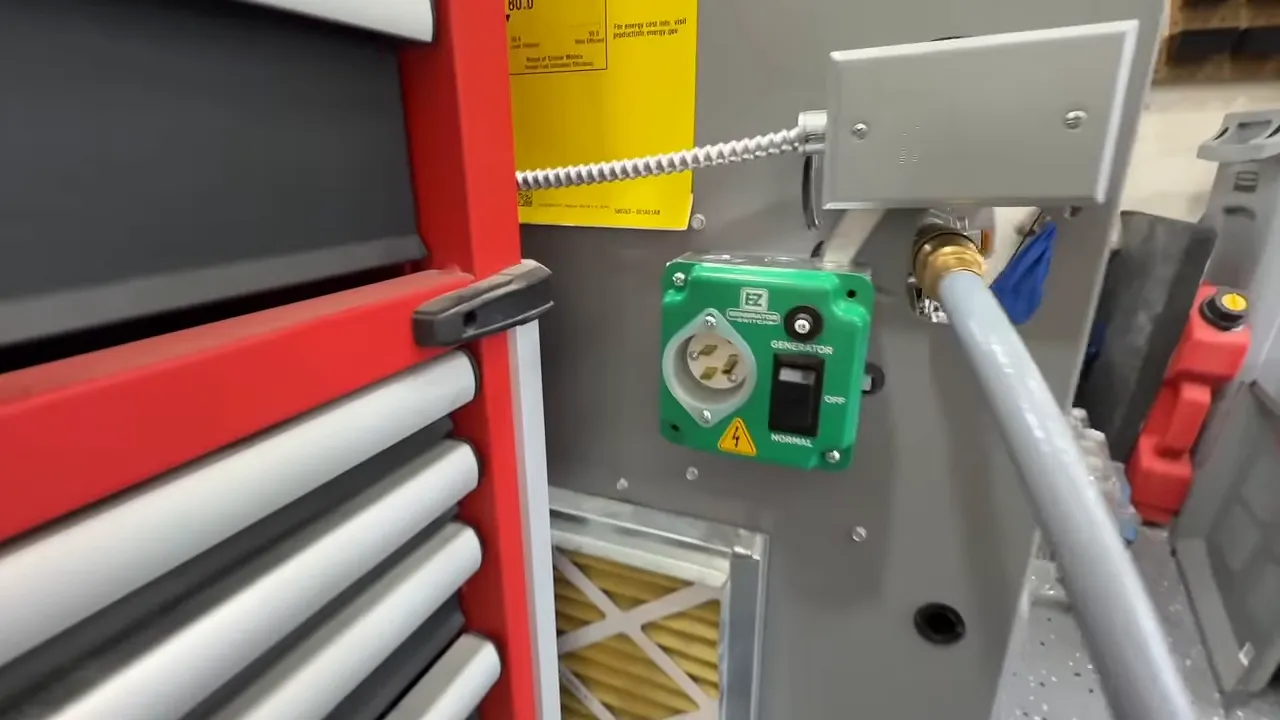
The important function is isolation. A correctly selected and installed transfer switch separates the furnace from utility power when it is supplied by the inverter. That prevents the backup source from energizing the utility side through that circuit.
Never try to feed the house through a wall receptacle, and never use a cord with exposed male plugs at both ends. Have a qualified electrician install the furnace transfer equipment according to its instructions and local electrical requirements.
Compatibility matters here, too. The inverter’s grounding and neutral arrangement must be suitable for the transfer equipment and furnace. If the furnace will not operate correctly, do not improvise grounding connections or bypass safety controls.
The Lower-Cost Cord-and-Plug Alternative
Another arrangement discussed for this project was a roughly $20 receptacle-and-pigtail conversion. The concept is to make the furnace supply a cord-and-plug connection, so the furnace can be unplugged from its normal source and connected to the backup extension cord.
That is not a universal substitute for a transfer switch. Whether a furnace may be connected this way depends on the furnace’s listing, manufacturer instructions, and local code. Have that checked before making changes. A lower parts cost is not a reason to use an unapproved wiring method.
Switch to Backup Power and Test the Heat
With suitable transfer equipment already installed, the operating sequence is straightforward:
- Set up the vehicle and inverter safely according to their instructions.
- Connect an appropriately rated, grounded extension cord to the inverter.
- Route the cord where it cannot be pinched, damaged, or exposed to unsuitable conditions.
- Connect the other end to the furnace transfer inlet.
- Select the backup or generator position as directed by the transfer-switch manufacturer.
- Set the thermostat to heating mode and raise the setpoint enough to call for heat.
In this test, the hot-surface igniter energized and the burners ignited with the furnace supplied through the extension cord from the truck. How stinking cool is that?
Still, ignition alone is not a complete test. Before relying on the system during an outage, confirm that the furnace completes its normal startup, runs its blower, and continues operating without overloading the inverter. Keep furnace panels and safety devices in their proper operating condition.
Plan for Battery Charging, Exhaust, and Runtime
The battery does not provide unlimited electricity. With the engine off, the inverter draws down the same battery you may need to restart the vehicle. The engine must run as needed to replenish that energy, but there is no universal safe schedule for starting it “from time to time.”
Runtime depends on the battery’s condition, the appliance load, and the charging system. Follow the vehicle manufacturer’s guidance on stationary operation and extended idling. Do not assume every alternator can keep up with every inverter load at idle.
Never run the vehicle in a garage or another enclosed or partially enclosed space, even with the garage door open. Operate outdoors, away from doors, windows, and air intakes, with the exhaust unobstructed. Maintain working carbon monoxide alarms in the home. The CDC’s carbon monoxide guidance explains the danger from vehicle exhaust and other combustion sources.
A vehicle may be quieter and less conspicuous than a portable generator, which is one practical appeal of this arrangement. But quieter does not mean harmless, undetectable, or safe to leave running unattended.
A Useful Backup Option, With Real Limits
If your goal is to keep a compatible gas furnace operating during a winter outage, a vehicle-powered inverter can be a budget-friendly option. It can also provide power for a refrigerator or other selected essentials when the electrical demands fit the system.
The key is preparing the whole setup before the emergency: verify the load, confirm vehicle capacity, use properly rated connections, install a code-compliant furnace transfer method, and test normal operation.
You may already have the engine and charging system parked in your driveway. Pair them with the right equipment and a safe plan, and they can become a useful part of your outage preparations.


