Cold air in the garage with the air conditioner unplugged from grid power? That is exactly what my Airspool solar mini split was delivering. With enough sunshine hitting the panels, this system can heat or cool without pulling electricity from the utility company.
That is pretty awesome. But after two years with this unit, the solar capability is only part of what I like about it. The Quick & Easy installation kit, simple connections, live energy monitoring, and customer support all help set it apart.
There is an important distinction here: solar can provide the operating electricity for free, but the equipment and installation still cost money. And solar-only operation depends on having enough sunlight. Here is how the system has worked in my garage, what I measured, and what I would consider before buying one.
Key Takeaways
- Airspool prioritizes solar power and supplements it with grid electricity when needed and available.
- My garage test produced approximately 41°F supply air and quiet indoor operation.
- The Quick & Easy kit simplifies connections with hand-tightened fittings and a twist-lock communications cable.
- The reviewed 12,000 BTU kit cost $1,995 with a 10-foot line set.
Table of Contents
- How the Airspool Solar Mini Split Uses Solar and Grid Power
- Garage Cooling Performance: 41°F Supply Air
- How Quiet Is It?
- What Makes the Quick & Easy Kit Different?
- Solar Panel Mounting: What I Learned the Hard Way
- The App Makes Energy Use Easy to Understand
- Maintenance After Two Years
- Warranty, Testing, and Customer Support
- Airspool Pricing and My Bottom Line
How the Airspool Solar Mini Split Uses Solar and Grid Power
My Airspool has been installed for two years, operating through summers and winters. The rooftop solar panels connect to the outdoor unit through its solar input and disconnect. The system prioritizes that solar power, then supplements it with grid electricity when needed and available.
You have three useful ways to run it:
- Grid power only: Use it as a regular mini split before adding solar panels.
- Solar with grid backup: Let the panels supply power first, with the grid making up any shortfall.
- Solar only: Run without a grid connection when the available solar power is sufficient.
That flexibility matters. You do not have to buy the mini split and complete the solar portion at the same time. If solar is a future project, you can start with grid-powered heating and cooling.
The indoor unit also has separate indicators for grid and solar power. Without solar connected, only the grid indicator illuminates. With sufficient solar and no grid connection, the solar indicator shows the active source.
This is a variable-speed system, so do not confuse solar-only operation with a promise of constant output under every sky condition. The amount of sunshine available matters.
What I saw as clouds passed overhead
During my test, the app showed approximately 820 watts of solar input and zero watts of AC grid input. At that point, the indoor unit was delivering air around 43°F. That is real cooling powered entirely by the sun.
Earlier, under cloud cover, I had seen roughly 600 watts from solar and 200 watts from the grid. Later, the AC input rose from zero to about 19 watts as conditions changed.
That is the behavior I like: the system uses available solar first and draws additional grid power when it needs it. It does not have to abandon solar just because a cloud moves through.
Garage Cooling Performance: 41°F Supply Air
The outdoor temperature was about 88°F, with a forecast high of 89°F. Inside the garage, the temperature had started near 80°F and dropped roughly 10 degrees in what felt like a short period. I did not record a precise cooldown time, so treat that as an observation rather than a timed performance test.
At the indoor outlet, I measured approximately 41°F supply air. With the garage around 70°F, that was roughly a 30°F difference between room air and the air coming out of the unit.
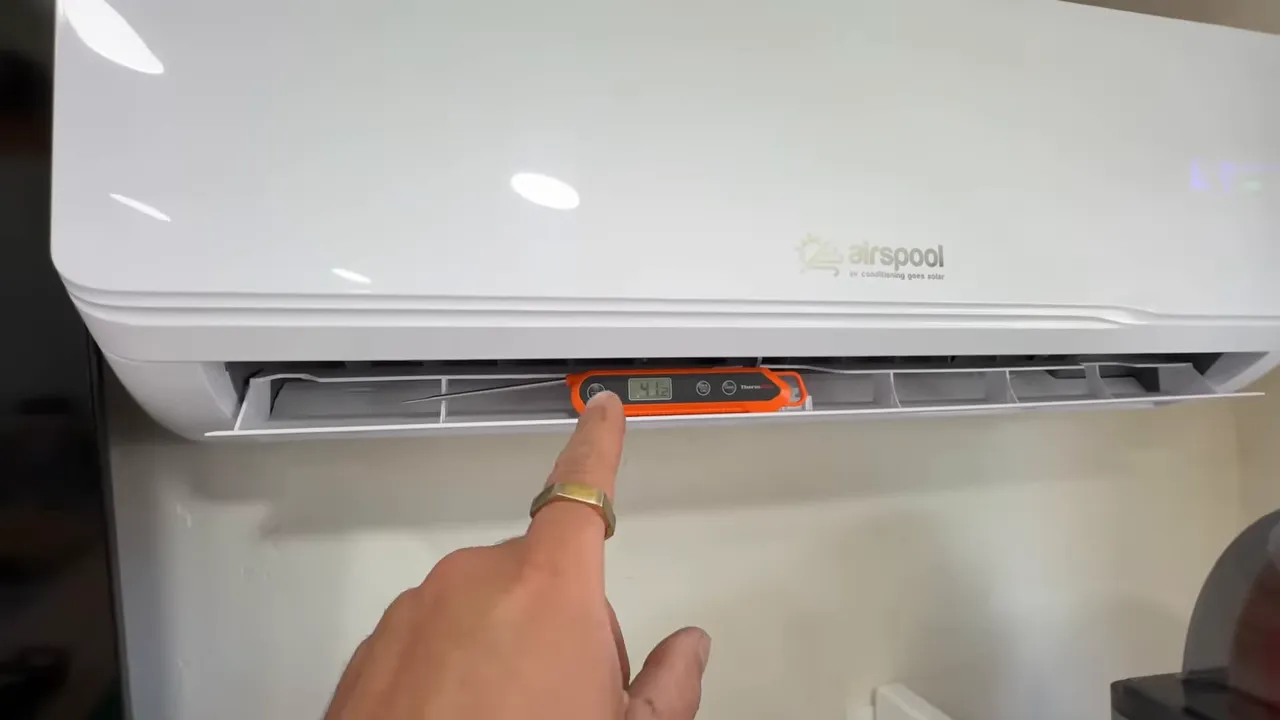
I was really pleased with that cooling performance. These are readings from my garage under those conditions, not a guarantee that every installation will produce the same temperature split.
The unit I tested is rated at 22 SEER. That efficiency is useful even if you initially run it entirely from the grid. For background on the equipment category, the U.S. Department of Energy explains how ductless mini split heat pumps provide heating and cooling without ductwork.
How Quiet Is It?
I checked both the outdoor and indoor units with a handheld sound meter.
- Outdoor unit: Approximately 54 decibels from about 4 feet away.
- Indoor unit: Approximately 42 decibels during the indoor check.
For the outdoor sound test, I made sure the unit was connected to grid power rather than relying solely on changing sunshine conditions. These were informal checks, not laboratory sound ratings.
Outside, the Airspool sounded much quieter to me than a traditional condenser. I would be comfortable having a normal conversation nearby. Inside, the sound level was low enough that the unit did not feel intrusive in the garage.
What Makes the Quick & Easy Kit Different?
Solar operation gets the attention, but the installation kit is a big reason I like this system. When comparing Airspool with EG4 or other solar mini splits, I would look closely at the connections and what arrives preassembled, not just the equipment price.
Preconnected, pre-spooled lines
With the Quick & Easy kit, the line set arrives pre-spooled, with the outdoor-side connections already made and the cover installed. You unspool the lines and make the remaining connection using the kit’s hand-tightened fittings.
The line-set connection does not require tools to tighten. On my installation, those connections have gone two years without a leak.
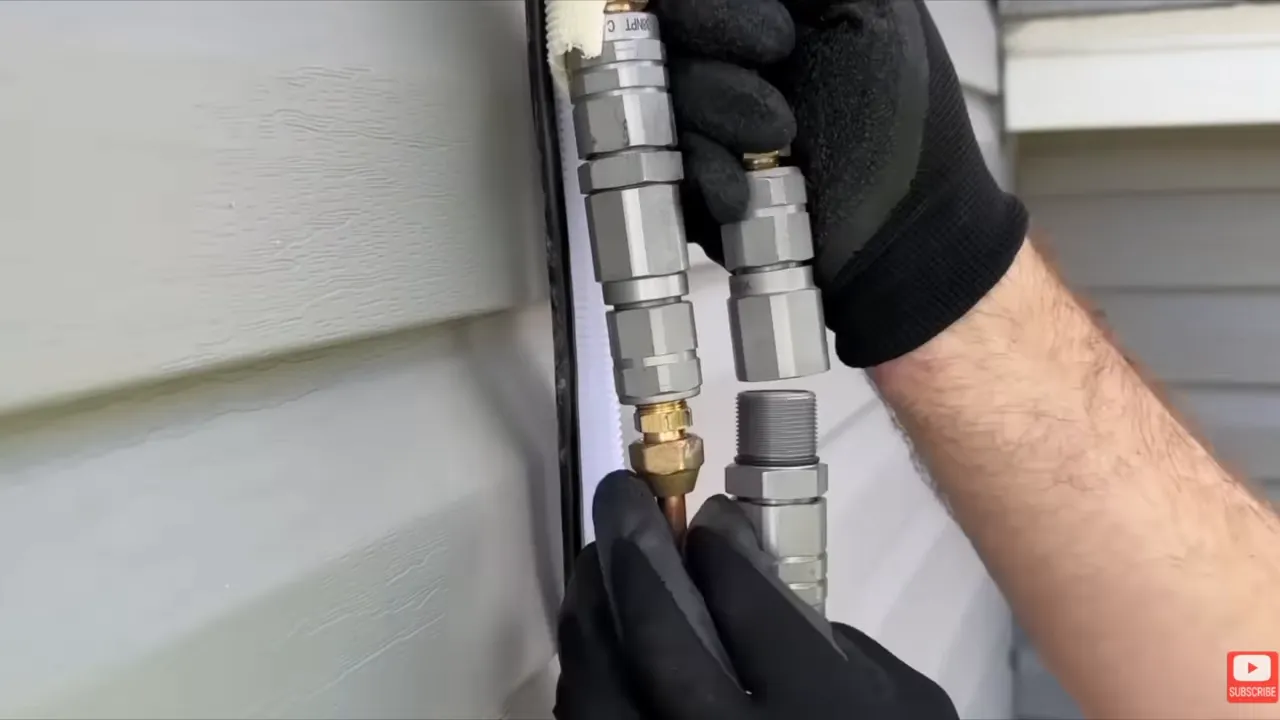
That is my experience with this particular kit, not a reason to apply the same connection method to a different mini split. Follow the instructions for the exact fittings supplied with your equipment.
Twist-lock communications connection
The communications cable uses a twist-lock connector. Instead of opening the panel and working through individual communications-wire connections, you connect and lock the plug.
It is a small detail that takes another fiddly job out of the installation.
Included installation bits and custom line lengths
The kit includes a 3-inch drill bit for the line-set wall opening and a Phillips bit for fastening components such as the indoor mounting plate.
I was blown away by how quickly the prepared components went together. I described it as about a five-minute installation, but that should not be your planning estimate for the entire project. Mounting, wall preparation, line routing, electrical work, and solar-panel installation are separate considerations. The quick connections are what make the assembly portion so easy.
Airspool also offers custom line-set lengths, with a stated maximum total length of 49 feet. That gives you more flexibility when the best indoor and outdoor locations are not close together.
Safety matters: This is an overview of my experience, not a complete installation procedure. Follow the manufacturer’s instructions and applicable requirements. Refrigerant service work can require certification; the EPA explains its Section 608 technician certification requirements.
Solar Panel Mounting: What I Learned the Hard Way
I originally used 2-by-4 lumber to elevate my Airspool-supplied panels above the roof. I assumed they needed an air gap. After speaking with Airspool, I learned that those particular panels were designed for direct roof mounting.
Airspool described them as suitable for temperatures around 185°F, with an expected service life of approximately 20 years. Those are the specifications and expectations relayed to me, not results from my own long-term panel testing.
The useful lesson is to check the requirements for the actual panels you buy. Do not assume every solar panel needs the same mounting arrangement, and do not assume every panel can sit directly on a roof.
For these panels, Airspool told me direct mounting was appropriate. The fastening and weatherproofing details should still follow the current mounting instructions for the panels and your roof.
The App Makes Energy Use Easy to Understand
One of my favorite features is seeing the power sources separately in real time. The app shows solar input and AC grid input, so I can tell whether the sun is covering the load or whether the system is drawing additional utility power.
Beyond energy monitoring, the app lets me:
- Select heating or cooling.
- Change the fan speed.
- Adjust the temperature setpoint.
- Create a schedule.
- See accumulated energy savings in watt-hours.
When I changed the temperature in the app, the indoor unit responded. Having the controls and energy information together makes it much easier to understand what the system is doing as sunlight changes.
Maintenance After Two Years
Routine filter access is straightforward. Lift the indoor unit’s front cover, and it stays open while you remove the mesh filters for cleaning.
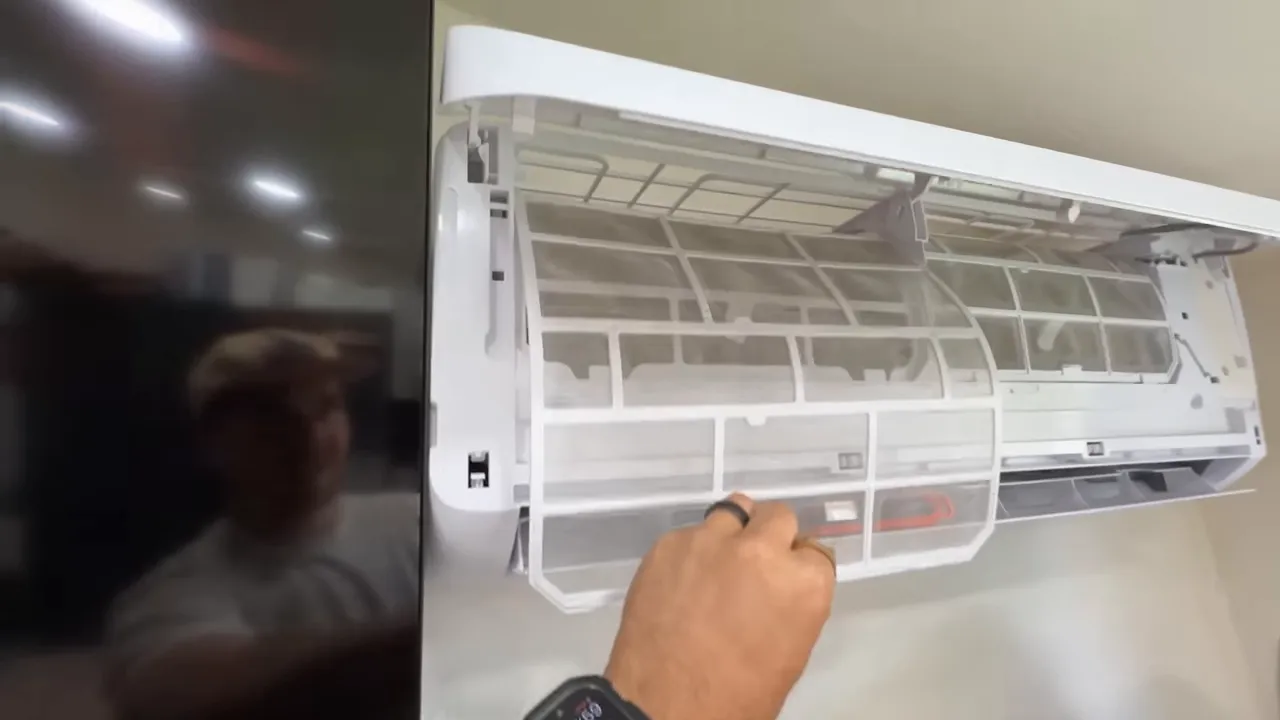
I have cleaned mine about once every six months, but that is my experience in this space, not a universal cleaning schedule. A dirtier or dustier area may require more frequent attention.
My routine has mainly involved cleaning the indoor screens and cleaning the outdoor unit periodically. The easy access is a plus, but it is still worth following the maintenance instructions rather than assuming low maintenance means no maintenance.
Warranty, Testing, and Customer Support
The customer service and guarantees are another reason Airspool stands out to me. At the time of this review, the company described two main protections:
- One-year Buy & Try guarantee: If you install the system and decide it is not for you within that year, Airspool says it provides a return shipping label and covers return shipping.
- Five-year functionality guarantee: Airspool describes this as a guarantee that the unit will continue functioning during that period.
Airspool also says it tests every unit in its warehouse before shipping. I value that extra check, along with having support available when installation questions come up, as mine did with the solar panels.
My understanding was that the supplied panels were also backed by the five-year warranty. Before ordering, confirm the current written terms, covered components, return conditions, and any installation requirements.
Airspool Pricing and My Bottom Line
At the time of this review, the 12,000 BTU Quick & Easy kit with a 10-foot line set cost $1,995. That is the specific kit price I quoted, not a total installed solar-system cost. Confirm what is included in the configuration you choose.
It costs a little more than some competing options. In my opinion, the preassembled kit, simple connections, individual testing, and support make that premium worth considering. Airspool also offers other sizes and configurations.
After two years, I am still enthusiastic about this setup. It cools my garage well, runs quietly, and can deliver cold air with zero grid input when the sunshine is sufficient. The ability to start on grid power and add solar later makes it an interesting option even if you are not ready for panels right away.
My advertised Airspool discount is $130 off with code DIYHVAC. Check current pricing, offer availability, and configuration details before ordering.


